About the creators

I wanted to take a moment and thank all of the people that have allowed me to share their work. All of the postings have the links to the original posting - click on the name of their site. If you find something that you really enjoy please take a minute to go to their site and leave them some love!! Without them, without their permission this would not exist. I try not to get to many from one person - unless what they have is so unique. I do not get anything in return from them...but let them know you found them here with me Jackie at Glitter Fantasies.
Showing posts with label Spellbinders. Show all posts

Friday, April 29, 2011

A Touch of Grace

There are a  few reasons that I love blog hops...forget the chance to win something - discovering new blogs is my favorite part!! Jerri with A Touch of Grace happens to be one of them. She amazing and her site is packed with tutorials, ideas, techniques..basically, everything you could hope for!


If you have been following me or even have just gone through my blog you have discovered I love making my own flowers!! Jerri has put together a GREAT tutorial series on making flowers that you must see!!
I strongly suggest visiting her, here is the link for the flower and embossing tutorials.  Trust me when I say you are going to want to spend some time over there and be sure to sign up for her mailing so you don't miss anything! One other tutorial she has is a very unique idea for adding texture to leaves - I loved it and will definitely be trying it!!
I could sit here and keep adding links for a very long time..but I will let you head over and look around. Jerri is also Copic Certified, an alumni for Split Coast Stampers, design team for Spellbinders, and she even has her own boutique! Needless to say she is very busy with an abundance of creativity! I had contacted her with a few questions and she was more than happy to answer them ( I am having embossing issues!! )

To find her boutique


Monday, April 18, 2011

Sandwiches for Spellbinders and other Machines

******Note on using plates******
I just learned that you should not mix plates between machines. Even if the thickness looks the same you can damage your unit and thus void warranty.

I am still working on this...whenever I come across one I will add it...if you have one to share let me know!

Spellbinder Wizard

Spellbinder Wizard Cutting Sandwiches

The sandwiches below are written so that the first item will be placed directly on the work surface and each additional item will be stacked on top. After stacking, run through sandwich through the Wizard. For more information on Spellbinders’ Die Templates universal application with other die cut machines or other dies used in the Wizard, check out our Compatibility Guide Linked.

Air Dry Clay

• White Master Mat
• White Spacer Plate
• Spellbinders’ Die Template, with ridges or cutting edge up
• Air dry clay rolled to 1/16th inch thick and dried
• White Master Mat

Aluminum Cans aka pop cans, soda cans or Coke cans, depending on your region

• White Master Mat
• White Spacer Plate
• Spellbinders’ Die Template, with ridges or cutting edge up
• Aluminum Can, cut into small pieces
• White Master Mat

Balsa Wood 1/32"

• White Mat
• Spellbinders’ Die Template, with ridges or cutting edge up
• Wood
• White Master Mat
Run the wood through the Wizard once or twice to cut. For embossing, swap the White Spacer plate for the Tan Embossing Pad, as in a paper embossing. You may need to wet the wood to get it to emboss.

Craft Foil

• White Master Mat
• White Spacer Plate
• Spellbinders’ Die Template, with ridges or cutting edge up
• Paper or Craft Foil
• White Master Mat

Embossing Enamel Veneer
• White Master Mat
• Spellbinders’ Die Template, with ridges or cutting edge up
• Baking Parchment
• Veneer
• Baking parchment
• White Master Mat
Prepare a veneer of embossing enamel: Apply a layer of embossing ink on a sheet of baking parchment. Sprinkle on a thin layer of embossing enamel (thermal embossing powder), heat and cool.

Felt

• White Master Matt
• Tan Embossing Pad
• White Spacer Plate
• Spellbinders’ Die Template, with ridges or cutting edge up
• Felt
• White Master Mat
For a more precise cut,  layer a piece of cardstock on top of the felt and run the sandwich through the Wizard twice. It may need a couple of snips with a scissor to finish the cut.


Fun Foam

• White Master Mat
• White Spacer Plate
• Spellbinders’ Die Template, with ridges or cutting edge up
• Fun Foam Sheet
• White Master Mat
If using adhesive backed foam, place the foam side to the die. This sandwich is for regular thickness craft foam, not the thicker ‘door hanger’ sheets.

HVAC tape

• White Master Mat
• White Spacer Plate
• Spellbinders’ Die Template, with ridges or cutting edge up
• HVAC tape, shiny side to die
• White Master Mat
HVAC tape is an aluminum tape with a release liner. It is sold in most home improvement stores and is usually found in the heating and air conditioning department. Do not confuse this with duct tape.

Paper or Cardstock

• White Master Mat
• White Spacer Plate
• Spellbinders’ Die Template, with ridges or cutting edge up
• Paper or Cardstock
• White Master Mat

Puffy Paper

• White Master Mat
• White Spacer Plate
• Spellbinders’ Die Template, with ridges or cutting edge up
• Puffy Paper (Dow product)
• White Master Mat

Shrink Plastic

• White Master Mat
• White Spacer Plate
• Spellbinders’ Die Template, with ridges or cutting edge up
• Shrink Plastic
• White Master Mat
• May need to run through twice
Different brands of shrink plastic yield different results as not all shrink plastics are the same thickness or density. Lucky Squirrel brand works well.

Styrofoam (Use with a picnic plate or to go hot cup)

• White Master Mat
• White Spacer Plate
• Spellbinders’ Die Template, with ridges or cutting edge up
• Styrofoam
• White Master Mat
After cutting and embossing, try heating to shrink

Unbaked Polymer Clay

•White Master Mat
• Plastic Wrap
• White Spacer Plate
• Prepared Spellbinders’ Die Template, with ridges or cutting edge up*
• Powdered clay
• Plastic Wrap
• White Master Mat
*Roll clay to 1/16" thickness, powder (baby powder or cornstarch) the clay and the die. Protect the White MAster Mats by using cling wrap (Saran). After cutting, place the die with clay still intact into the freezer to firm up the clay and to assist in removal.

Spellbinder Wizard Embossing Sandwiches

Spellbinders Wizard provides 3,000 pounds of pressure to bring about some of the crispest dry embossing found in the craft market today. To assist in the process, try misting paper with water or other specialty embossing product, before running the sandwich through the machine.

Air Dry Clay

• White Master Mat
• Texture sheet or other item that will emboss
• Dried clay sheet
• White Master Mat
See cutting air dried clay for more information.

Balsa Wood 1/16" (will not cut)

• White Master Mat
• White Spacer Plate
• Spellbinders Die Template, with ridges or cutting edge up
• Wood
• White Master Mat

Brass Stencils

• White Master Mat
• Brass Stencil, writing side down
• Cardstock or foil
• Tan Embossing Pad
• White Master Mat

Charms

• White Master Mat
• Charm: flat fabric, thin polymer shape, flat finding
• Cardstock or foil
• One to two Tan Embossing Pads
• Blue or Black Mat

Cuttlebug™ embossing folders (any size)

• White Master Mat
• Folder with paper or cardstock inside
• White Master Mat
If too hard to run through, follow this sandwich:
• White Master Mat
• White Spacer Plate
• Folder with paper or cardstock inside
• Blue Master Mat (from charm kit)

Fiskars® Texture Plates

• White Master Mat
• Fiskars® Texture Plate
• Paper of Craft Foil
• Tan Embossing Pad
• Blue Mat
See Compatibility Chart for other company’s embossable items.

Leather

• White Master Mat
• White Spacer Plate
• Spellbinders Die Template, with ridges or cutting edge up or Brass Stencil
• Misted Leather
• White Master Mat or Blue Master Mat (charm kit)    
Experiment with thickness of leather. Thicker leather will emboss well but not cut.


Metal words, letters

• White Master Mat
• Thin metal word or letter
• Craft Metal or Paper
• Tan Embossing Pad
• Blue Mat

Organza bags

• White Master Mat
• Tan Embossing Pad piece
• Bag with item to be embossed inside
• Tan Embossing Pad
• White Mat
Size the Tan Embossing Pad to just fit the item being embossed and place them both inside the bag

Plastic Sun Catcher

• White Master Mat
• Plastic sun catcher, approximately 1/16" thick
• Craft Foil
• Tan Embossing Pad
• White Master Mat 
If the foil gets cut through in some areas, substitute a piece of craft foam for the tan polymer pad.

Paper or Craft Foil

• White Master Mat
• Spellbinders Die Template, with ridges or cutting edge up
• Die cut paper
• Tan Embossing Pad
• White Master Mat

Spellbinders Texture Plates (metal)

• White Master Mat
• Spellbinders texture plate
• Paper or Craft Foil
• Tan Polymer Pad
• White Master Mat

Styrofoam with a stamp

• White Master Mat
• Unmounted Stamp
• Styrofoam
• White Mat

Textured wall paper

• White Master Mat
• Wall paper
• Foil
• Tan Embossing Pad
• White Master Mat

Velvet

• White Master Mat
• Unmounted Stamp
• Velvet, nap side down
• Blue Mat
Spray back of velvet with water, heat with heat tool, run through. 100% cotton velvet works best but rayon blends will work well also.

Vinyl sticker embossing

• White Master Mat
• White Spacer Plate
• Prepared acetate with stickers
• Cardstock or foil
• Tan Embossing Pad
• White Master Mat
 Make a custom design by applying vinyl stickers onto a sheet of acetate. A deeper emboss is achieved by applying a second layer of sticker (identical design) on top of the first.

Spellbinder Wizard Make An Embellishment

To embellish the Spellbinders Die Templates, leave the die cut paper, either embossed or not, inside the die. Color through the holes, using it as a stencil: chalk, paint, pens, etc.

Bottle Caps:
Flattening

• White Master Mat
• Piece of Paper
• Bottle Cap, flat side down
• Tan Embossing Pad
• Blue Mat 

Reproduced in Metal

• White Master Mat
• Tan Embossing Pad
• Flattened Bottle Cap, face up or down
• Craft Foil
• Tan Embossing Pad
• White Master Mat

Set  eyelets:
In cardstock

• White Master Mat
• Tan Embossing Mat
• Paper with eyelets inserted into holes
• Eyelet Setting Plate
• Tan Embossing Mat
• Blue Mat
The eyelets must stay in the holes when turned over for this technique to work. Using a Japanese Screw-punch can give some flexibility with the hole sizes.

In leather
• White Master Mat
• Tan Embossing Mat
• Leather with eyelet in it, end to be flattened facing up
• Steel plate
• Blue Mat

Snap setting sandwich
• White Master Mat
• Paper or fabric with the snaps in place (one part of each two-part snap on either side)
• Tan Polymer Pad
• White Master Mat.
This sandwich allows setting of a single or multiple snaps in paper or fabric.

Techniques

Apply Rub-ons

• White Master Mat
• Paper or foil
• Rub-on image
• Two Tan Embossing Pads
• Finish with Blue or Black mat
• Carefully remove rub-on backing after running it through

Bone folding

• White Master Mat
• Item to be folded (Card, Page Element, Wire, Metal, etc.)
• Piece of Paper
• Tan Embossing Pad
• White Master Mat
Catopia Using Clearsnap’s Cat Eye Chalk Ink, smudge colors randomly onto glossy cardstock. When satisfied with the combination and amount of color, buff gently with a paper towel. Use the colored paper as any normal paper but with surprisingly wonderful results when cut with Spellbinders Die Templates.

Cutting/embossing 1/32" Balsa Wood

• White Embossing Mat
• Spellbinders Die Template, with ridges or cutting edge up
• Balsa Wood
• Blue Mat
Before using the sandwich to cut, give one side of the wood two coats of Mod Podge. Let dry. Place the treated side up in the sandwich. The wood will emboss and cut at the same time.

Faux Stained Glass

• White Master Mat
• Spellbinders Die Template, with ridges or cutting edge up
• Clear Transparency
• White Master Mat
Emboss the stencil into the transparency. Color using a flowing medium, such as stain glass effects paint, Sakura Glaze pens or alcohol inks. The colorant should flow into the sunken embossed areas.

Faux Pounded Flowers for those with allergies or without fresh blooms

• White Embossing Mat
• White cardstock
• Prepared faux flowers
• Waxed paper
• Tan Embossing Pad
• White Master Mat
Use Clearsnap chalk inks and apply onto cheap silk flower… ones you don’t mind throwing away.


Line art turned into an embossing stencil

• White Master Mat
• Spacer Plate
• Handmade embossing stencil
• Paper or Craft Foil
• White Mat
Outline a simple art piece such as a line drawing, text, logo, etc. with a medium that has depth such as: hot glue, gesso, wire, UTEE, etc. Allow to dry. Complete as many layers as desired. Use the above sandwich to emboss paper or foil.

Make your own foam stamps

• White Master Mat
• Spacer Plate
• Spellbinders Die Template, with ridges or cutting edge up
• Craft Foam
• White Master Mat
Cut the foam craft sheet. Emboss. Adhere using temp adhesive to a CD case, plastic block or wood block.

Making shaker/shadow boxes
• White Master Mat
• Spacer Plate
• Spellbinders’ Die Template, with ridges or cutting edge up
• Craft foam with adhesive back
• White Master Mat
Nestabilities Die Templates make creating small shaker and shadow boxes a snap! Cut several identical frames. Craft foam provides nice depth and is easy to cut. Mount the first frame onto a piece of decorative cardstock. Layer on 2 to 3 more frames. Insert shaker elements or artwork. Place acetate on top of stack if making shaker box. Place last frame on top (this one may be cut from cardstock or foil.)

Polymer Clay flattening

•
White Master Mat
• Tan Embossing Mat
• Clear Plastic Wrap
• Raw Clay
• Clear Plastic Wrap
• Blue Mat
Peel wrap away from the Tan Embossing Mat and then from the clay.

Pressed Flower Transfer
• White Master Mat
• White cardstock (watercolor paper is ideal)
• Fresh flowers such as pansies, Johnny jump-ups, etc.
• Tan Embossing Pad
• White Mat

Reflections Technique
• White Master Mat
• Spellbinders Die Template, cutting ridges facing the Master Mat
• Die Cut, lined up with the embossing holes
• Tan Embossing Pad
• White Master Mat This technique is used to make a mirror image of a die cut. For instance, if the giraffe normally faces to the right, this sandwich will create one that faces to the left. Begin by die cutting the image as usual but do not emboss. Remove the die cut and line it up over the image from the back of the die. It is helpful to use a piece of removable tape to hold it in place. Run through the Wizard. The die cut will not be embossed around the edges, but once inked and embellished; it will resemble any other die cut.  

Spellbinder Wizard Transfer Techniques

Photo Onto copper
• White Master Mat
• Tan Embossing Mat
• Foil, prepared for transfer
• Photo printed on transparency, face down
• White Master Mat
Prepare the foil by applying a thin layer of Omni Gel or Golden Gel Medium in any finish.
Photo Onto Fabric or Leather
• White Master Mat
• Wax Paper
• Canvas
• Image sprayed with Transfer Medium
• Waxed Paper
• Tan Embossing Pad
• White Mat
Inkjet onto Fabric or other porous surface

• White Master Mat
• Canvas or paper
• Print out, face down
• Tan Embossing Pad
• White Master Mat
Cheap photo paper and regular (not archival) inkjet prints make beautiful, detailed transfers onto paper, cardstock, fabric or other thin, porous material. Use a graphics program to layout images/words. Be sure to reverse any words so they will transfer properly. Print the image onto glossy photo paper using good or high print quality. Mist your fabric (paper or twill tape, etc.) so it's damp. Hold your printout vertically. Spray mist into the air and then wave the printout through the mist so it gets wet. A few mists should do it—use care that the ink doesn’t get so wet that it runs. 


Spellbinder dies and the Vagabond

Solo Platform
Sizzix Wafer-Thin Die Adapter
one clear cutting pad
Spellbinder die, cut side up
cardstock
one clear cutting pad


Wednesday, April 6, 2011

Ribbon Bow

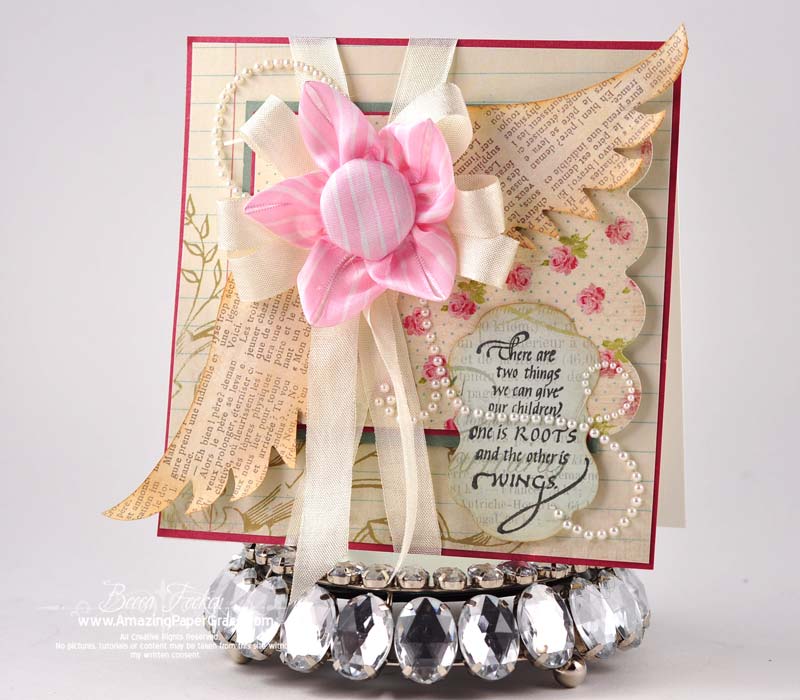
Once again Becca has done it again! I think she dreams about making bows in her sleep. She does explain what she used to make this stunning card - BUT - and this is the BEST part!! She made a video on how to make the bow!!!!! So head on over to Amazing Grace Papers and learn how you to can make this lovely card!! Don't worry, it looks as if it would be hard to make - never fear she makes them easy to do!


Monday, April 4, 2011

Easel Card

This lovely card was created by Mindy at Scrappy and Piggy. Now obviously you don't have to make this using a Grand Nestie...but I thought it was lovely how she made this. And I personally LOVE that stamp that she used - I love the fact that she includes links on the products she used..hehe I must find and have that stamp!!! While I was browsing her blog...subtle hint - please if you find a tutorial you enjoy please go to the original creator and leave them some love!! Anyways I found out she is on the design team for Cutter's Creek!! If you have ever looked around my blog you have seen that Kim is amazing!!! Ok enough if listening to me....here is the tutorial!! And as always scroll down to find a video!!!

Easel cards are very popular and you see them everywhere.  Using the Grand Nestabilities, you can make a  really good size easel card.  For this card I used the Labels 1 Grand Nestabilitie.  I cut a piece of cardstock to 6 x 12 and folded it in half, then I laid it on the mat of my Grand Calibur.  I made sure that part of the die was above the fold of the card so it would stay in one piece after I cut it.
tutorial 003 [1280x768]
I held my paper down with a couple pieces of eclipse tape so that it would stay put and not move around.  This tape is made for masking and it will not damage your paper when you remove it.  I ran the paper through the Grand Calibur.  It cut 2 layers of thick Bazzil cardstock with no problem.  Next I put the top part of the card on my scor pal and scored it so that it would fold in half.
tutorial 004_edited-1 [1280x768]
It was easy to do with this die since the point is right in the middle.
The next step is to fold the top half of the card in half and put some adhesive on it.
tutorial 008_edited-1 [1280x768]

Then you need to cut another labels 1 die out of the same cardstock.
Line the piece up with the top of the folded part and stick them together.
tutorial 009_edited-1 [1280x768]
Now your easel card is complete!  It’s time to decorate it.  I used the 2nd smallest die for the card base, so I used the smallest one for my decorative paper.  Then I colored an adorable Boho Gilli stamp and cut it out with a labels 8 nestie.
tutorial 012_edited-1 [1280x768]
Here is a picture of the easel card opened up.  You need something to  stop it and hold the top up when it’s open.  I cut a fancy spellbinders tag and popped it up with some pop dots.  I stamped a couple of heart swirls and a sentiment from Stamping Scrapping Designs on the tag.  I filled the centers of the flowers with some I-rock gems.  I also used I-rock gems on Gilli’s earrings.  I finished the card off with a nice big flower and a brad I made with the I-top brad maker.    Here is a picture of the card when it is flat- perfect for being mailed. 
tutorial 014_edited-1 [1280x768]
I hope I have inspired you to use your Grand Calibur and nestabilities to make your own easel card.

As always here is a video - I know I am NOT the only one that needs a video as well LOL.
OH MY!!! I am doing the happy dance here!!! Both tutorials use Spellbinders and have the most adorable girl stamps on them!!! I am going to try to contact her she called it Sassy Suzy but didn't understand where she got it from! Her name is thenorsugirl  and her blog as been removed - someone please help me locate her!!! Well, onto the video!! I am happy to say Sari responded to my email and has 2 blogs, here are the links to them http://sarispysselblogg.bloggagratis.se/   http://sarispyssligasida.blogspot.com/ Enjoy!!!

Sunday, March 27, 2011

Grand Nestabilities Purse with Mini Purse

This is way to adorable NOT to have, wish I had a little girl to make this for!!! Got this from Spellbinders blog.


My daughter and I fell in love with Mona’s purse.  In fact she requested one for her favorite doll too!.  I simply used the same shape die templates for both projects.
For my daughters purse I used Grand Nestabilities LF-190 Grand Labels Four, LF-126 Grand Squares and LF-127 Grand Scalloped Squares die templates.
For the doll’s purse I used standard sized Nestabilities S4-190 Labels Four, S4-309 Labels Four SM, S4-126 Classic Squares LG and S4-127 Classic Scalloped Squares LG
.
Other supplies on my purses include: Spellbinders S4-124 Classic Scalloped Circles LG for the felt rose.  Worldwin Treasures White Cardstock, Beacon Adhesives Zip Dry Adhesive;  SCRAPBOOK ADHESIVES by 3L E-Z Runner adhesive;  Copic Sketch marker V99; felt squares; patterned paper; hook and loop fastener.
I made the felt rose embellishment to resemble a clasp.  See how to Make a Rolled Rose with Nestabilities video by Blog Team Member Heidi Blankenship.
.
.
I received rave reviews from my daughter, on behalf of her doll, so I would like to extend a hearty thank you to Mona and Heidi for sharing their wonderful & inspirational projects with us.
Have a wonderful weekend

:) Kazan

Spellbinders is a trademark of Spellbinders Paper Arts, llc.
Grand Nestabilities are registered trademarks of Spellbinders Paper Arts. llc.
Nestabilities are registered trademarks of Spellbinders Paper Arts. llc

Saturday, March 26, 2011

Grand Labels Four Card


Begin by taping the  LF-190 Grand Labels Four  #4 (#1 being the smallest) to cardstock aligning the folded piece of the paper under the to cut edge of the template.  Cut/emboss and then ink the die cut.
Next, cut/emboss S4-207 Kaleidoscope Pendant die template and then cut it straight down the middle.
I love how this die template looks like a doily.  Doilies are very fun to create with and often they are used with just a portion showing.  I choose to cut mine in half and then use both sides at either end of the card.  Ink each side of the die cut and adhere to the card base.
The background of my card was created by cutting and embossing a LF-110 Grand Oval #1 die template out of pattern paper.  Adhere it to yellow cardstock and trim close to the edge to give it a small border.  After inking, center teh oval between the two ends of the Kaleidoscope.
Stamp Gina K. Designs Lovely Labels stamp on to cardstock.  This stamp is designed to fit inside a  S4-190 Labels Four #5 but I wanted to use a smaller die template.  This brings the stamped image right to the edge for a different, but just as great look.
Using the Labels Four shape accents the orignal shape to the card and using this stamp allows you to have an open spot to put your sentiment.  After cutting out the Label, stamp the sentiment in the center and adhere to the card.
To create the roses, use two different sizes of S4-125 Classic Scalloped Circles SM out of felt.  Cut  from the outside edge in creating a spiral.
Using Zip Dry and starting from the outside, roll the felt piece in until you have formed a rose.  Allow a few minutes to dry.  Spray with Tattered Angels Glimmer Mist, Coral Reef, Suede and Sweet Pea, and ink the very tips to achieve a more realistic and distressed look.  Embellish the centers with pearls and adhere to the card using Glue Dots.
Supplies:   Spellbinders Grand Calibur™,  LF-190 Grand Labels Four , LF-110 Grand Oval , S4-125 Classic Scalloped Circles SM ,   S4-190 Labels Four,  S4-207 Kaleidoscope Pendant ;  Worldwin, Oatmeal Treasures;  Clearsnap Colorbox Chalk Ink; Creative Impressions Bits of Bling Pearls; Gina K Designs Lovely Labels Stamps; JustRite Stampers, Kindness Set; KaiserCraft Trim; Tattered Angels Glimmer Mist, Coral Reef, Suede and Sweet Pea; Glue Dots;  Cardstock, Pattern Paper, Brown ink
Adding some three dimensional die cuts to your craft projects can be so much fun.  I hope you get a chance to try it!  Thanks for taking the time to check out our projects today!

Julie

Spellbinders is a trademark of Spellbinders Paper Arts, llc.
Grand Nestabilities are registered trademarks of Spellbinders Paper Arts. llc.

Rolled Rose with Nestabilities

This week Heidi Blankenship created a beautiful card that featured some gorgeous roses using Spellbinders™ Die Templates.  You saw it on HSN on Monday!  Heidi has graciously shared her card on the blog today.

Tuesday, March 15, 2011

Grand Nestabilities Gatefold Card

I am on the Spellbinders mailing list so that I can give myself more excuses to buy their items and the projects that are shown are amazing. This one however really sparked my attention I think it is absolutely beautiful and I just had to have it...so since it is a card style - a gatefold card....this was all the excuse I needed to add it to my blog. My Crafter's Companion and my Martha Stewart scorer has all the lines and directions to make gatefold cards. So this will help anyone who doesn't have either of these to create an amazing gatefold card. Kazan is a designer for 2010 Spellbinders and here is her blog link http://nunutoolies.blogspot.com/. As always here is the link for the original tutorial (I renamed the link since it was extremely long) Spellbinders Grand Nestabilites Gatefold Card.

.
This type of card can be made several different ways, however today I will show you how to make a simple tri-fold card using Spellbinders™ Grand Labels Four.
.
.
Here’s what you will  need to complete your Project: Spellbinders LF-190 Grand Labels Four, S5-026 Labels Twenty, S4-293 Lacey Circles.  My Mind’s Eye Mabel “Play” Damask Patterned Paper, JustRite Stampers Kindness Set and You Inspire Me Set, Creative Impressions Metal Loops, SCRAPBOOK ADHESIVES by 3L E-Z Runner, Clearsnap Ancient Page ink.  Other supplies include: Webster Pages, Tsukineko ink, satin ribbon & Scor-it board.
.
.
.
Cut the card base from patterned paper using LF-190 Grand Labels Four #6 (#1 being the smallest die template in the set).  Measure 2 ½” in from the end of the cut shape and score a vertical crease in the paper.  Repeat this process on both sides.  Fold both sides along the scored lines to form the base of the gatefold card.  To make a panel for the center of the card, cut/emboss paper in the center of of the LF-190 Grand Labels Four #6 die template.  Adhere the panel to the center of the gatefold card.
.
.
To make the decorative label, stamp the JustRite border image on white cardstock.  Position Labels Twenty die template #3 (1# being the smallest die template in the set) over the stamped image and gently secure with clear removable tape. After cutting/embossing the image, stencil the edges with ink before removing the die from the die template.  Stenciling this will give you a crisp white border around the embossed edges.
Stamp the JustRite sentiment on white cardstock. Position Lacey Circles die template #2 over the stamped sentiment and gently secure with clear removable tape. After cutting/embossing the sentiment apply the chalk to the area inside the die template, them remove the paper from the die template and ink the edges.
Attach the metal loops and thread the ribbon through them.  Adhere the sentiment to the label with a foam square and adhere half of the label to one flap so that the label overlaps the flap.  Finish the gatefold card by tying the ribbon into a decorative bow and adhering Fussy-cut flowers to the front of the card.
Thank you so much for joining me today. If you would like to see more inspiration on creating gatefold projects using Spellbinders product take a peek at Margie’s Pendant Card and her beautiful Pocket Filled with Words card.  I hope you enjoy making all types of gatefold cards with your Grand Nestibilities®.  I would love to see them too!

Kazan

Tuesday, February 22, 2011

Storing Spellbinders

Well now that I have become addicted to Spellbinders I have been looking for ways to store them. It must be both economical and functional...so what to do. I have found several different ways but I have not picked which way I am going to do it..but I figured I would share some ideas. Now everyone knows about the storage things that Spellbinders has...but as the crafter's we are..we always want to find another way.

Up first - and so far I must admit I love this way for oh so many reasons - check it out this is from Becca at Amazing Paper Grace. The following is from her blog http://www.amazingpapergrace.com/spellbinders-storage/.

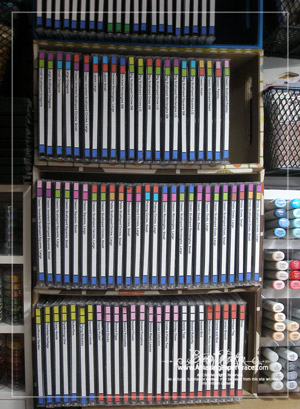
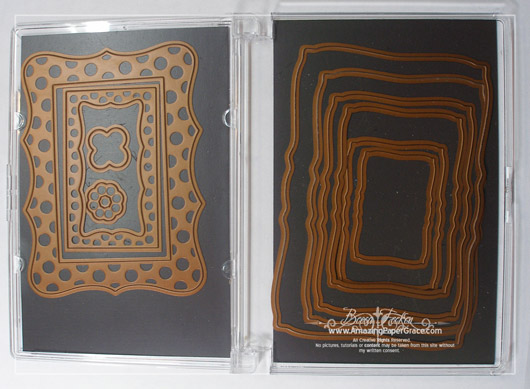
My Spellbinders are one of my most used tools and I have a hefty investment in them so I want to make sure they get their use.  My Spellbinders storage probably looks like your Spellbinders storage, the fat CD cases make for perfect storage!   But, I found that after I color coded mine – I had a solution that really, really worked for me and it has saved me time and frustration.  When I’m in the middle of creating, my desk becomes a mess and I could never seem to put my hands on the dies I needed – now they each have a place.
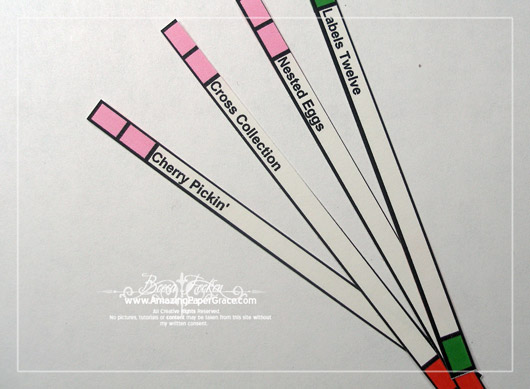
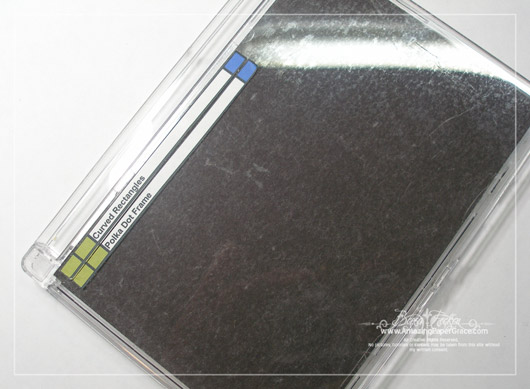
I group my dies in categories – Standard Shapes, Pendants, Labels, Flowers, Nested Shapes, etc.  All of my circles are all stored together and at the top of the label I left a place for two colors – the first color is the same for all circles – the second color changes depending on if it is a smooth circle or a scalloped circle.  All of my scallop shapes have a lime green label so that I can find them.   If you ever decide to color code yours, tailor the colors to what works best for you.  Below you can see some of the items I used and the pictures are clickable if you want to see a larger version.

I keep my storage within an arms reach of where I sit because I access them frequently.  Here I’ve stacked up CD holders that I purchased at Target.
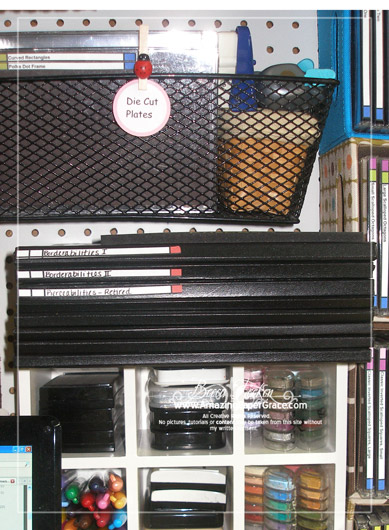
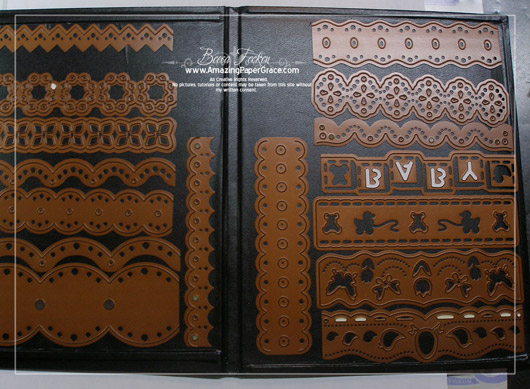
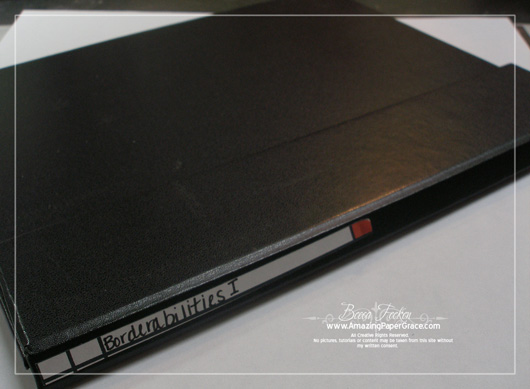
I also store my Borderabilities and long dies within an arms reach.
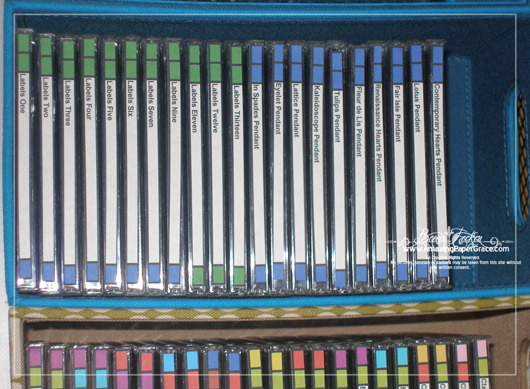
Here you can see the color coding a little bit better.
I simply make an excel spreadsheet, drop in the colors and cut the grid out so that it can be applied to the  spine of the CD.   These are ready to apply.
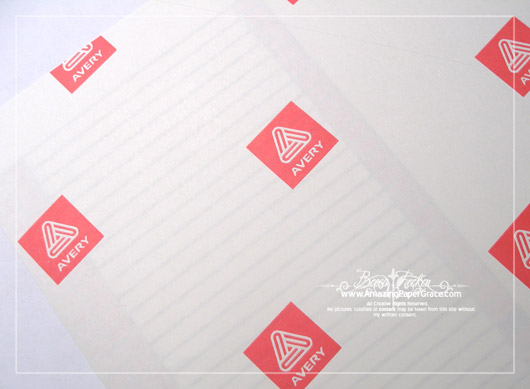
The spreadsheet is printed on an inkjet printer on Full Sheet Avery Labels (8165) before being cut out.  This is what I started out with.
For the longer nested dies I use CD Cases – I covered them in another post HERE.
I simply apply my spine label to the front of the CD Case.
I store my 6″ borders in a magnetic album.
This one was picked up in the scrapbooking section at Hobby Lobby.


Spellbinders Ruffled Flower Medallion Tutorial

Hello everyone!! You have to check out this amazing tutorial! I love it, and she makes it look so easy...I shall find out now won't I. I had seen a flower like this somewhere but could never figure out how to make it... I accidentally stumbled across Becca and her site Amazing Paper Grace. As I was just browsing around I found this tutorial. Take a minute and head on over to her site I am sure you will love her work as much as I did. Take a minute to look around..it is how I found this! Here is link to the original tutorial. http://www.amazingpapergrace.com/spellbinder-ruffled-flower-tutorial/


Supply List:
Spellbinders Large Scalloped Octagons Scissors
Two sided design paper Invisible tape
Bone folder or optional Scorpal Long reach hole punch
Large Brad or Threaded Button Glue Dots
A friendly reminder, it takes a lot to put together pics and such for tutorials and I offer this tutorial up in the spirit of sharing.  Most people are grateful and offer credit where credit is due.  Because others may want to sample my other tutorials, I encourage and welcome link backs to this tutorial, you do not have to ask permission.
Using Spellbinders Scalloped Large Octagons, cut/emboss one of the largest size, cut/emboss three of the second largest size and cut/emboss three of the second from smallest size.  Set the largest scalloped octagon aside, we will use it later.

(Optional) To prepare your cut shapes for scoring, align the flat edge of the scalloped octagon shape with the top of your Scorpal.

Score straight down through the shape.  This score line will fall between the second and third scallop on each flat side of the octagon.

Each scalloped octagon will have four scored lines.

Using a long reach punch, set a hole in the center of each octagon, this will prevent the paper from tearing when folding.  Then snip along one score line down to the center cut hole.

Fold each of the three pieces of the medallion.  The first fold will be a mountain fold where the fold will rise above the cut edge.

Alternate mountain folds with valley folds so that each piece looks the same as that shown below.

With a bone folder, burnish the edge of each fold so they are sharp and crisp.

Using invisible scotch tape, place one piece of tape underneath your first piece of medallion with the sticky side facing up.  The tape will end up on the underneath side of the medallion and fairly inconspicuous.

Marry the second piece of your medallions to the first by placing side by side on the upward facing sticky side of the tape.

Do the same with each seam.  There will be a total of three seams.

Cut a center hole in the scalloped octagon piece that we set aside.

Put glue dots on the bottom of your medallion.  I found that six glue dots was plenty, one on every other fold.

Flip medallion over and secure it to the bottom piece that had been set aside.

Construct another medallion using the three small scalloped octagons
.
Seat the smaller medallion on top of the larger medallion, matching folds.

Put an embellishment like a brad or threaded button through the aligned center holes.

Voila!!!  Your medallion is finished, it just needs to be adhered to something.  These can be made in any size and can also be made with round scallops however the scalloped octagons are easier to work with and look prettier in my humble opinion.  You can add as many layers as you want and if you want a more rufflier medallion, thow in another folded piece.

Here’s what I did with this one.  I’m done buying bows for gift bags — too often the bow cost more than the bag . . .  Now I have a very cost effective alternative.  I hope you enjoy making medallions, once you get used to the process, they move along very quickly.