As I mentioned while I was looking for twisted easel card I noticed there were several variations...well here is one of them.. I just love Christina from Card Making Magic tutorials - how easy are there to understand...can it get any easier?? I was so tickled when she first told me I could share them!! So without further delay the Double Twisted Easel Card!!

Step 1
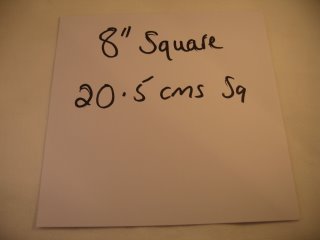
You will need a piece of card that measures 20.5cms square
(8" square)
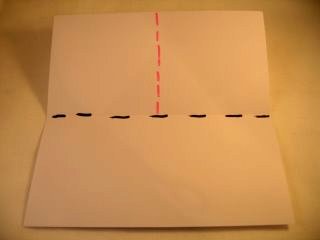
Step 2 Then you will need to score and fold the card in half. (The black dashed line)
One of the halves then needs to be measured in half, but don't crease it.
(The pink dashed line shows where you need to CUT the card)
Step 3
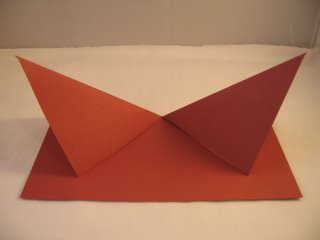
Take each of the panels and fold the inner edge down to the outer edge.
(The photo shows you how it should look )
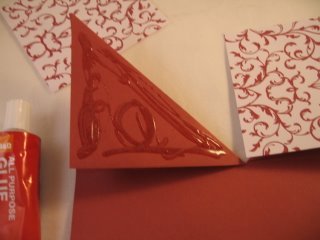
Step 4 Cut to pieces of card 10.25cms square (4" square)
Apply glue to the lower triangle of the card only.
(The photo shows you where)
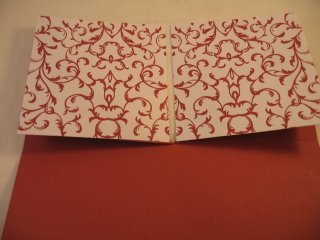
Step 5
Carefully attach the two pieces of card to the triangular flaps.
Make sure that they don't interfere with the opening of the card.
I find it easier to lay the card down as shown here to attach the pieces of card.
And if you use wet glue you will have a little time to re-adjust before the glue sets
 Line the bottom inside of the card with some pretty paper of your choice. You will need to make a centre panel and place it on some deep foam pads or silicone glue to raise it up.
This is the piece that will hold the easel open.
I have added a sentiment to my centre and surrounded it with Flowers
You are now ready to add any Embellishments you may have in your stash.
I have added smoe Gemstones and Pearls to the centre of the flowers.
Sprinkle them with some fine glitter for added ooomph!
I hope you enjoy making this lovley Double Twisted Easel Card, and don't forget to add the photos to the Gallery Page

As always I need a video so that I can really understand...she only goes by usyungs - so if anyone knows who this is and how to contact her please let me know!

Step 1
You will need a piece of card that measures 20.5cms square
(8" square)

Step 2 Then you will need to score and fold the card in half. (The black dashed line)
One of the halves then needs to be measured in half, but don't crease it.
(The pink dashed line shows where you need to CUT the card)

Step 3
Take each of the panels and fold the inner edge down to the outer edge.
(The photo shows you how it should look )

Step 4 Cut to pieces of card 10.25cms square (4" square)
Apply glue to the lower triangle of the card only.
(The photo shows you where)

Step 5
Carefully attach the two pieces of card to the triangular flaps.
Make sure that they don't interfere with the opening of the card.
I find it easier to lay the card down as shown here to attach the pieces of card.
And if you use wet glue you will have a little time to re-adjust before the glue sets
 Line the bottom inside of the card with some pretty paper of your choice. You will need to make a centre panel and place it on some deep foam pads or silicone glue to raise it up.
 This is the piece that will hold the easel open.
I have added a sentiment to my centre and surrounded it with Flowers
You are now ready to add any Embellishments you may have in your stash.
I have added smoe Gemstones and Pearls to the centre of the flowers.
Sprinkle them with some fine glitter for added ooomph!
I hope you enjoy making this lovley Double Twisted Easel Card, and don't forget to add the photos to the Gallery Page


No comments:
Post a Comment