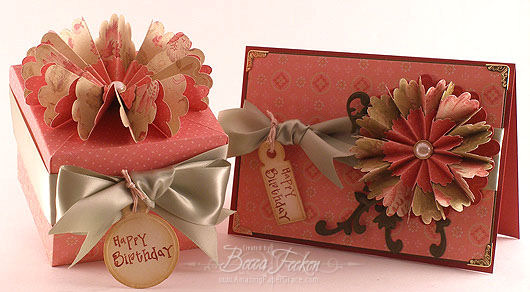
Hello everyone!! You have to check out this amazing tutorial! I love it, and she makes it look so easy...I shall find out now won't I. I had seen a flower like this somewhere but could never figure out how to make it... I accidentally stumbled across Becca and her site Amazing Paper Grace. As I was just browsing around I found this tutorial. Take a minute and head on over to her site I am sure you will love her work as much as I did. Take a minute to look around..it is how I found this! Here is link to the original tutorial. http://www.amazingpapergrace.com/spellbinder-ruffled-flower-tutorial/
Supply List:
A friendly reminder, it takes a lot to put together pics and such for tutorials and I offer this tutorial up in the spirit of sharing. Most people are grateful and offer credit where credit is due. Because others may want to sample my other tutorials, I encourage and welcome link backs to this tutorial, you do not have to ask permission.
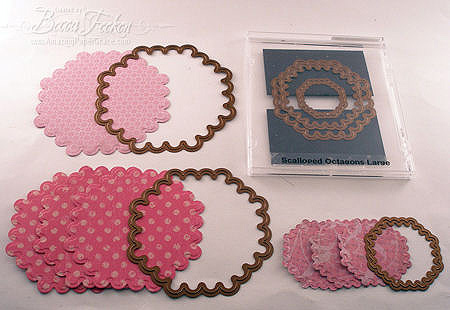
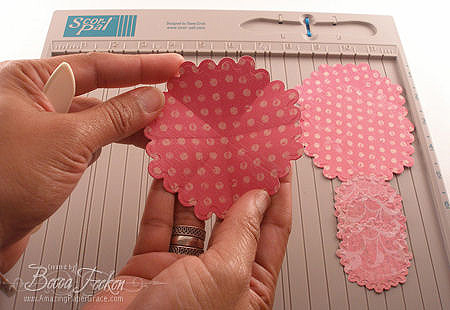
Using Spellbinders Scalloped Large Octagons, cut/emboss one of the largest size, cut/emboss three of the second largest size and cut/emboss three of the second from smallest size. Set the largest scalloped octagon aside, we will use it later.
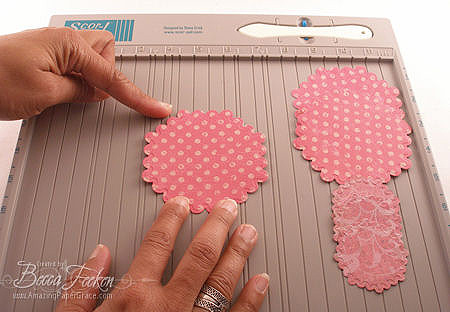
(Optional) To prepare your cut shapes for scoring, align the flat edge of the scalloped octagon shape with the top of your Scorpal.
Score straight down through the shape. This score line will fall between the second and third scallop on each flat side of the octagon.
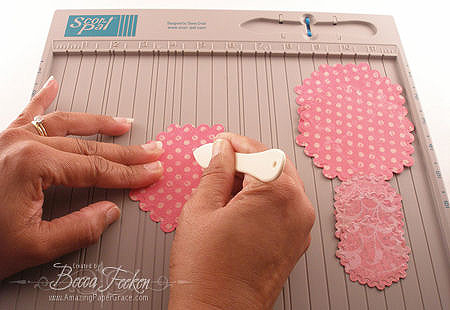
Each scalloped octagon will have four scored lines.
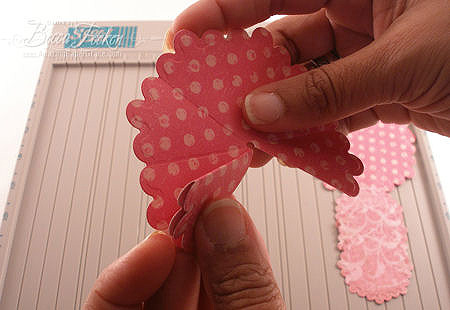
Using a long reach punch, set a hole in the center of each octagon, this will prevent the paper from tearing when folding. Then snip along one score line down to the center cut hole.

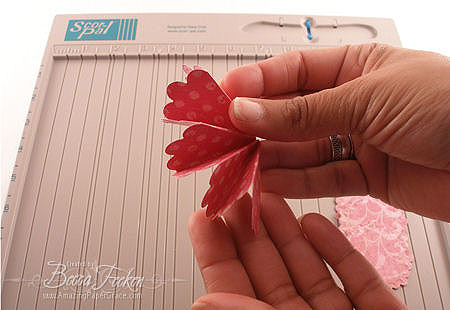
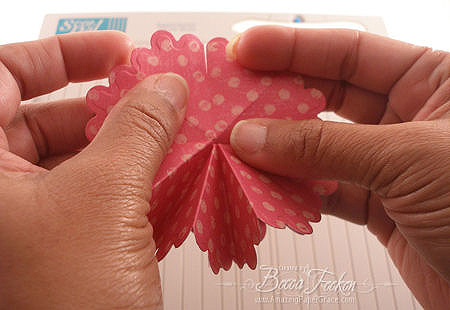
Fold each of the three pieces of the medallion. The first fold will be a mountain fold where the fold will rise above the cut edge.
Alternate mountain folds with valley folds so that each piece looks the same as that shown below.
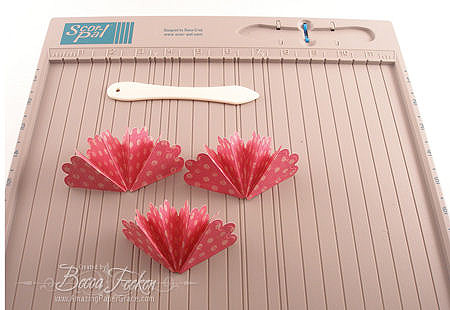
With a bone folder, burnish the edge of each fold so they are sharp and crisp.
Using invisible scotch tape, place one piece of tape underneath your first piece of medallion with the sticky side facing up. The tape will end up on the underneath side of the medallion and fairly inconspicuous.
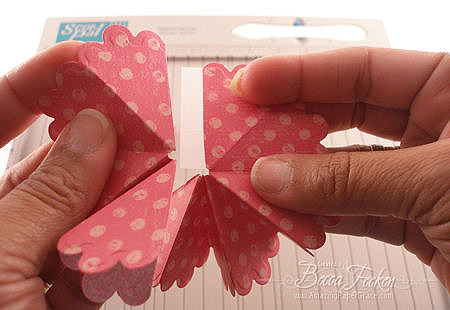
Marry the second piece of your medallions to the first by placing side by side on the upward facing sticky side of the tape.
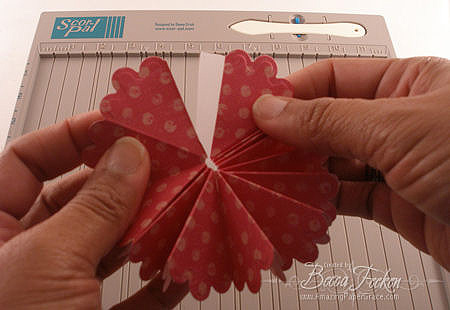
Do the same with each seam. There will be a total of three seams.
Cut a center hole in the scalloped octagon piece that we set aside.
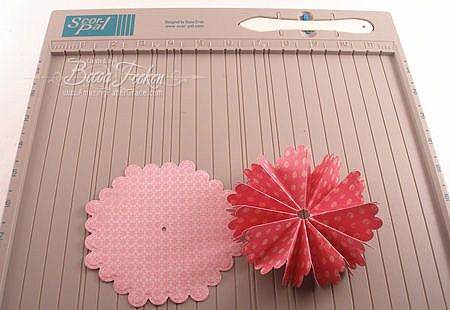
Put glue dots on the bottom of your medallion. I found that six glue dots was plenty, one on every other fold.
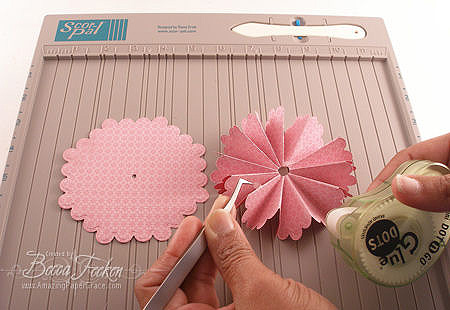
Flip medallion over and secure it to the bottom piece that had been set aside.
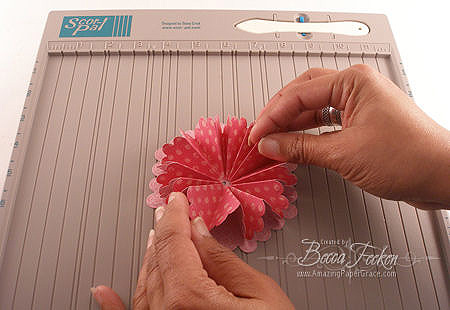
Construct another medallion using the three small scalloped octagons
.
Seat the smaller medallion on top of the larger medallion, matching folds.
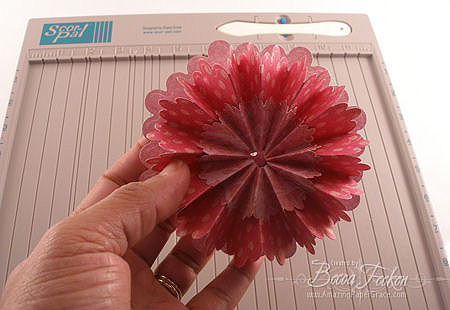
Put an embellishment like a brad or threaded button through the aligned center holes.
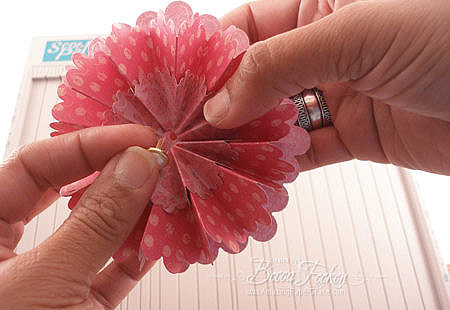
Voila!!! Your medallion is finished, it just needs to be adhered to something. These can be made in any size and can also be made with round scallops however the scalloped octagons are easier to work with and look prettier in my humble opinion. You can add as many layers as you want and if you want a more rufflier medallion, thow in another folded piece.
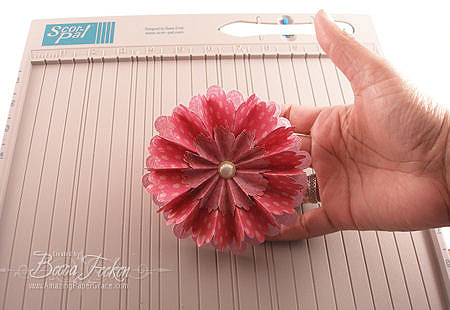
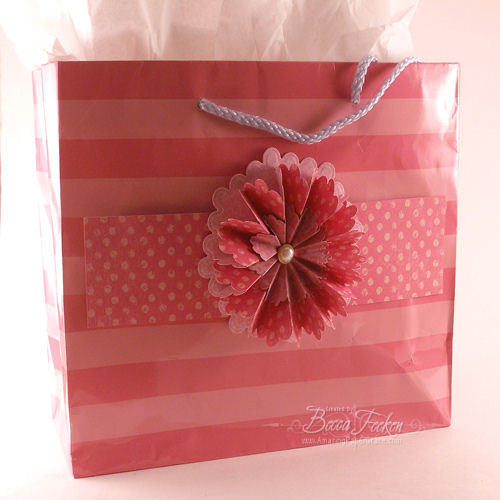
Here’s what I did with this one. I’m done buying bows for gift bags — too often the bow cost more than the bag . . . Now I have a very cost effective alternative. I hope you enjoy making medallions, once you get used to the process, they move along very quickly.
Supply List:
| Spellbinders Large Scalloped Octagons | Scissors |
| Two sided design paper | Invisible tape |
| Bone folder or optional Scorpal | Long reach hole punch |
| Large Brad or Threaded Button | Glue Dots |
Using Spellbinders Scalloped Large Octagons, cut/emboss one of the largest size, cut/emboss three of the second largest size and cut/emboss three of the second from smallest size. Set the largest scalloped octagon aside, we will use it later.
(Optional) To prepare your cut shapes for scoring, align the flat edge of the scalloped octagon shape with the top of your Scorpal.
Score straight down through the shape. This score line will fall between the second and third scallop on each flat side of the octagon.
Each scalloped octagon will have four scored lines.
Using a long reach punch, set a hole in the center of each octagon, this will prevent the paper from tearing when folding. Then snip along one score line down to the center cut hole.
Fold each of the three pieces of the medallion. The first fold will be a mountain fold where the fold will rise above the cut edge.
Alternate mountain folds with valley folds so that each piece looks the same as that shown below.
With a bone folder, burnish the edge of each fold so they are sharp and crisp.
Using invisible scotch tape, place one piece of tape underneath your first piece of medallion with the sticky side facing up. The tape will end up on the underneath side of the medallion and fairly inconspicuous.
Marry the second piece of your medallions to the first by placing side by side on the upward facing sticky side of the tape.
Do the same with each seam. There will be a total of three seams.
Cut a center hole in the scalloped octagon piece that we set aside.
Put glue dots on the bottom of your medallion. I found that six glue dots was plenty, one on every other fold.
Flip medallion over and secure it to the bottom piece that had been set aside.
Construct another medallion using the three small scalloped octagons
.
Seat the smaller medallion on top of the larger medallion, matching folds.
Put an embellishment like a brad or threaded button through the aligned center holes.
Voila!!! Your medallion is finished, it just needs to be adhered to something. These can be made in any size and can also be made with round scallops however the scalloped octagons are easier to work with and look prettier in my humble opinion. You can add as many layers as you want and if you want a more rufflier medallion, thow in another folded piece.
Here’s what I did with this one. I’m done buying bows for gift bags — too often the bow cost more than the bag . . . Now I have a very cost effective alternative. I hope you enjoy making medallions, once you get used to the process, they move along very quickly.
No comments:
Post a Comment